
2.3.7 Radiosity

|
|
2.3.6 Simple Media Tutorial |
POV-Ray 3.6 for UNIX documentation 2.3.7 Radiosity |
2.3.8 Making Animations |
|
Radiosity is a lighting technique to simulate the diffuse exchange of radiation between the objects of a scene. With a raytracer like POV-Ray, normally only the direct influence of light sources on the objects can be calculated, all shadowed parts look totally flat. Radiosity can help to overcome this limitation. More details on the technical aspects can be found in the reference section.
To enable radiosity, you have to add a radiosity block to the global_settings in your POV-Ray scene file. Radiosity
is more accurate than simplistic ambient light but it takes much longer to compute, so it can be useful to switch off
radiosity during scene development. You can use a declared constant or an INI-file
constant and an #if statement to do this:
  #declare RAD = off;

  global_settings {
     #if(RAD)
        radiosity {
           ...
        }
     #end
  }
Most important for radiosity are the ambient and diffuse finish components of the objects. Their effect differs quite much from a conventionally lit scene.
ambient: specifies the amount of light emitted by the object. This is the basis for radiosity
without conventional lighting but also in scenes with light sources this can be important. Since most materials
do not actually emit light, the default value of 0.1 is too high in most cases. You can also change ambient_light
to influence this.
diffuse: influences the amount of diffuse reflection of incoming light. In a radiosity scene this
does not only mean the direct appearance of the surface but also how much other objects are illuminated by indirect
light from this surface.
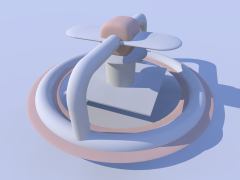
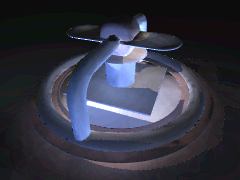
The pictures here introduce combined conventional/radiosity lighting. Later on you can also find examples for pure radiosity illumination.
The following settings are default, the result will be the same with an empty radiosity block:
  global_settings {
    radiosity {
      pretrace_start 0.08
      pretrace_end   0.04
      count 35

      nearest_count 5
      error_bound 1.8
      recursion_limit 3

      low_error_factor 0.5
      gray_threshold 0.0
      minimum_reuse 0.015
      brightness 1

      adc_bailout 0.01/2
    }
  }
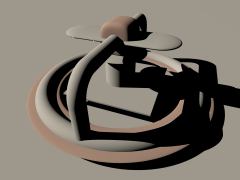
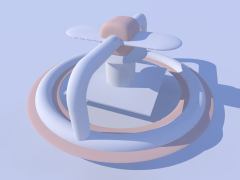
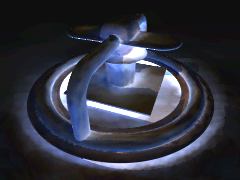
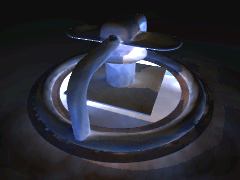
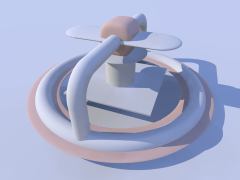
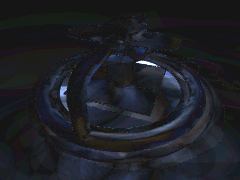
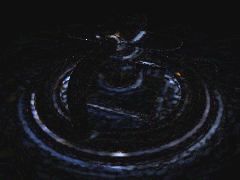
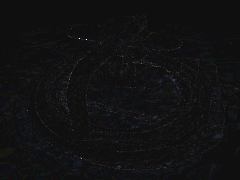
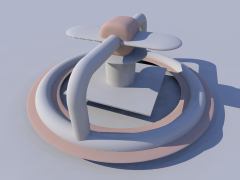
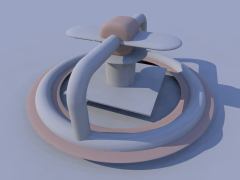
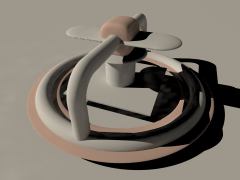
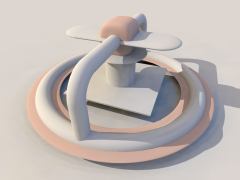
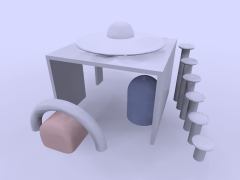
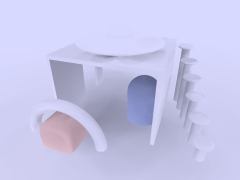
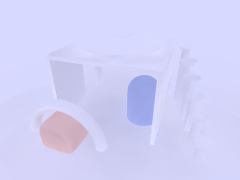
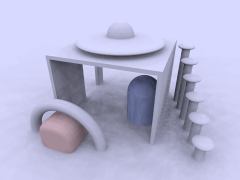
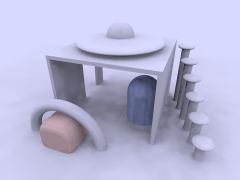
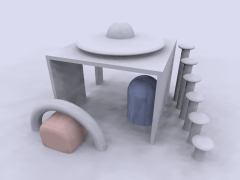
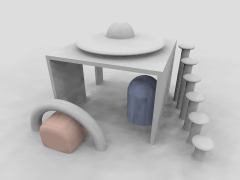
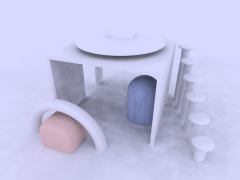
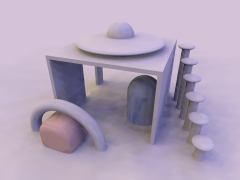
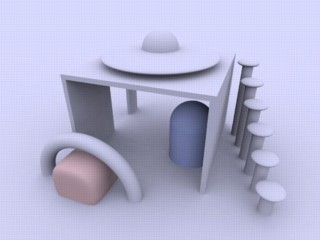
The following pictures are rendered with default settings and are made to introduce the sample scene.
All objects except the sky have an ambient finish of 0.
The ambient 1 finish of the blue sky makes it functioning as some kind of diffuse light source. This
leads to a bluish touch of the whole scene in the radiosity version.
 |
 |
 |
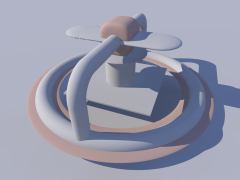
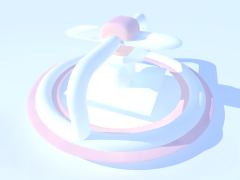
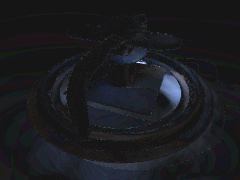
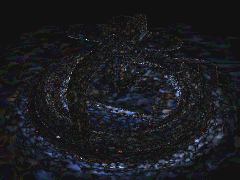
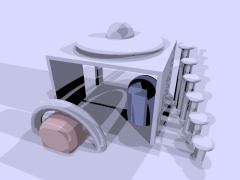
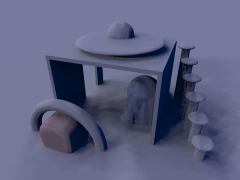
You can see that radiosity much affects the shadowed parts when applied combined with conventional lighting.
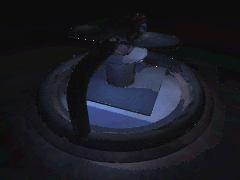
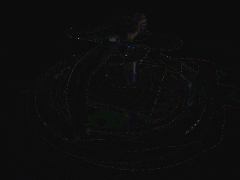
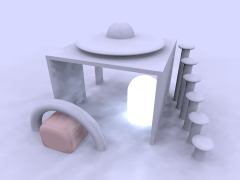
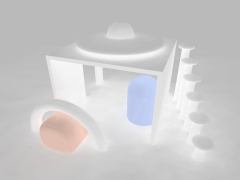
Changing brightness changes the intensity of radiosity effects. brightness 0 would be the
same as without radiosity. brightness 1 should work correctly in most cases, if effects are too strong
you can reduce this. Larger values lead to quite strange results in most cases.
 |
|
 |
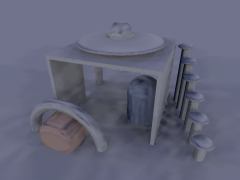
Changing the recursion_limit value leads to the following results, second line are difference to
default (recursion_limit 3):
 |
 |
 |
 |
 |
 |
You can see that higher values than the default of 3 do not lead to much better results in such a quite simple scene. In most cases values of 1 or 2 are sufficient.
The error_bound value mainly affects the structures of the shadows. Values larger than the default of
1.8 do not have much effects, they make the shadows even flatter. Extremely low values can lead to very good results,
but the rendering time can become very long. For the following samples recursion_limit 1 is used.
 |
 |
 |
 |
 |
 |
Somewhat related to error_bound is low_error_factor. It reduces error_bound during the
last pretrace step. Changing this can be useful to eliminate artefacts.
 |
 |
 |
 |
 |
The next samples use recursion_limit 1 and error_bound 0.2. These 3 pictures illustrate
the effect of count. It is a general quality and accuracy parameter leading to higher quality and slower
rendering at higher values.
 |
 |
 |
Another parameter that affects quality is nearest_count. You can use values from 1 to 20, default is
5:
 |
|
 |
Again higher values lead to less artefacts and smoother appearance but slower rendering.
minimum_reuse influences whether previous radiosity samples are reused during calculation. It also
affects quality and smoothness.
 |
|
 |
 |
 |
Another important value is pretrace_end. It specifies how many pretrace steps are calculated and
thereby strongly influences the speed. Usually lower values lead to better quality, but it is important to keep this
in good relation to error_bound.
 |
|
 |
Strongly related to pretrace_end is always_sample. Normally even in the final trace
additional radiosity samples are taken. You can avoid this by adding always_sample off. That is
especially useful if you load previously calculated radiosity data with load_file.
|
|
 |
 |
The effect of max_sample is similar to brightness. It does not reduce the radiosity
effect in general but weakens samples with brightness above the specified value.
 |
 |
|
You can strongly affect things with the objects' finishes. In fact that is the most important thing about radiosity. Normal objects should have ambient finish 0 which is not default in POV-Ray and therefore needs to be specified. Objects with ambient > 0 actually emit light.
Default finish values used until now are diffuse 0.65 ambient 0.
 |
 |
 |
Finally you can vary the sky in outdoor radiosity scenes. In all these examples it is implemented with a sphere
object. finish { ambient 1 diffuse 0 } was used until now. The following pictures show some variations:
 |
 |
 |
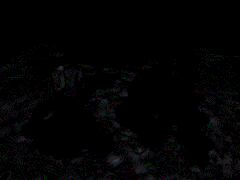
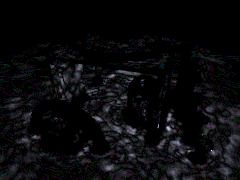
You can also leave out all light sources and have pure radiosity lighting. The situation then is similar to a cloudy day outside, when the light comes from no specific direction but from the whole sky.
The following 2 pictures show what changes with the scene used in part 1, when the light source is removed.
(default radiosity, but recursion_limit 1 and error_bound 0.2)
|
|
 |
You can see that when the light source is removed the whole picture becomes very blue, because the scene is illuminated by a blue sky, while on a cloudy day, the color of the sky should be somewhere between grey and white.
The following pictures show the sample scene used in this part with different settings for recursion_limit
(everything else default settings).
 |
 |
 |
This looks much worse than in the first part, because the default settings are mainly selected for use with conventional light sources.
The next three pictures show the effect of error_bound. (recursion_limit is 1 here)
Without light sources, this is even more important than with, good values much depend on the scenery and the other
settings, lower values do not necessarily lead to better results.
|
|
 |
 |
If there are artefacts it often helps to increase count, it does affect quality in general and often
helps removing them (the following three pictures use error_bound 0.02).
 |
 |
 |
The next sequence shows the effect of nearest_count, the difference is not very strong, but larger
values always lead to better results (maximum is 20). From now on all the pictures use error_bound 0.2
 |
 |
 |
The minimum_reuse is a geometric value related to the size of the render in pixel and affects whether
previous radiosity calculations are reused at a new point. Lower values lead to more often and therefore more accurate
calculations.
 |
|
 |
In most cases it is not necessary to change the low_error_factor. This factor reduces the error_bound
value during the final pretrace step. pretrace_end was lowered to 0.01 in these pictures,
the second line shows the difference to default. Changing this value can sometimes help to remove persistent
artefacts.
 |
 |
 |
 |
 |
gray_threshold reduces the color in the radiosity calculations. as mentioned above the blue sky
affects the color of the whole scene when radiosity is calculated. To reduce this coloring effect without affecting
radiosity in general you can increase gray_threshold. 1.0 means no color in radiosity at all.
|
|
 |
 |
Another important parameter is pretrace_end. Together with pretrace_start it specifies the pretrace
steps that are done. Lower values lead to more pretrace steps and more accurate results but also to significantly
slower rendering.
 |
 |
 |
It is worth experimenting with the things affecting radiosity to get some feeling for how things work. The next 3 images show some more experiments.
 |
 |
 |
Finally you can strongly change the appearance of the whole scene with the sky's texture. The following pictures give some example.
 |
 |
 |
Really good results much depend on the single situation and how the scene is meant to look. Here is some "higher quality" render of this particular scene, but requirements can be much different in other situations.
  global_settings {
    radiosity {
      pretrace_start 0.08
      pretrace_end   0.01
      count 500

      nearest_count 10
      error_bound 0.02
      recursion_limit 1

      low_error_factor 0.2
      gray_threshold 0.0
      minimum_reuse 0.015
      brightness 1

      adc_bailout 0.01/2
    }
  }
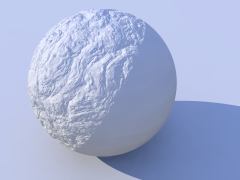
When using a normal statement in combination with radiosity lighting, you will see that the shadowed parts of the objects are totally smooth, no matter how strong the normals are made.
The reason is that POV-Ray by default does not take the normal into account when calculating radiosity. You can
change this by adding normal on to the radiosity block. This can slow things down quite a lot, but
usually leads to more realistic results if normals are used.
When using normals you should also remember that they are only faked irregularities and do not generate real geometric disturbances of the surface. A more realistic approach is using an isosurface with a pigment function, but this usually leads to very slow renders, especially if radiosity is involved.
 |
 |
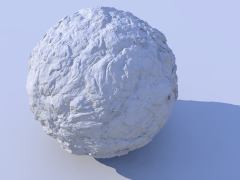 |
You can see that the isosurface version does not have a natural smooth circumference and a more realistic shadowline.
Radiosity can be very slow. To some extend this is the price to pay for realistic lighting, but there are a lot of things that can be done to improve speed.
The radiosity settings should be set as fast as possible. In most cases this is a quality vs. speed compromise.
Especially recursion_limit should be kept as low as possible. Sometimes 1 is sufficient, if
not 2 or 3 should often be enough.
With high quality settings, radiosity data can take quite a lot of memory. Apart from that the other scene data is also used much more intensive than in a conventional scene. Therefore insufficient memory and swapping can slow down things even more.
Finally the scene geometry and textures are important too. Objects not visible in the camera usually only increase parsing time and memory use, but in a radiosity scene, also objects behind the camera can slow down the rendering process.
More about "reference section"
|
|
2.3.6 Simple Media Tutorial | 2.3.7 Radiosity | 2.3.8 Making Animations |
|